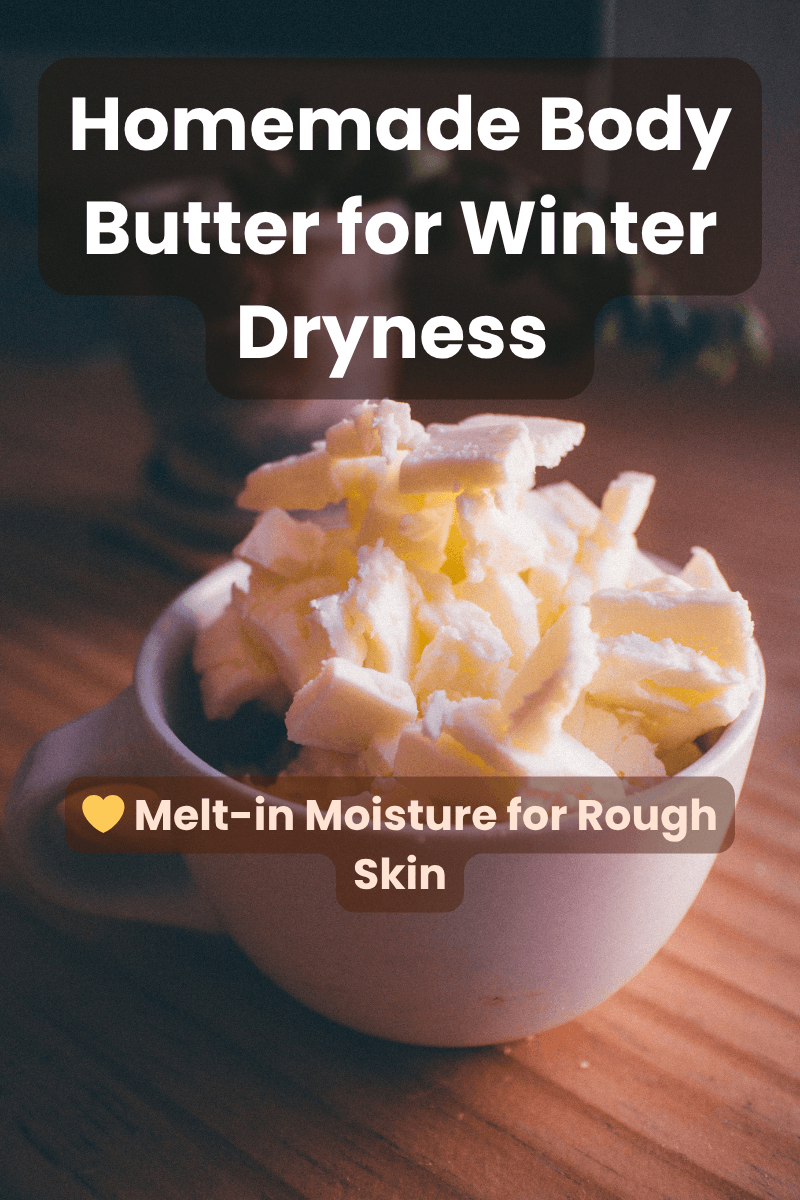
Dry, flaky winter skin? Time to ditch those underperforming store-bought lotions and embrace the deep, long-lasting nourishment of homemade body butter. When the temperatures plummet and indoor heaters crank up, our skin suffers—losing precious moisture and becoming irritated, cracked, and tight.
This post will walk you through a step-by-step guide to making your very own whipped body butter at home—rich in natural oils, free from chemicals, and completely customizable for your skin’s needs. Ready to transform your dry skin into silky softness?
Jump to: Why It’s Perfect for Winter | Benefits | Ingredients | DIY Recipe | How to Use | Customize | Storage | Fix Issues | Final Thoughts
Why Your Skin Needs Homemade Body Butter in Winter
Store-bought lotions often contain drying alcohols, preservatives, and synthetic fragrances that do more harm than good. Even the ones that claim to be “natural” can include irritating chemicals just to improve shelf life.
In contrast, homemade body butter is made with nourishing, skin-loving ingredients—no toxins, no fillers, just pure moisture.
✅ Top Benefits of Homemade Body Butter:
- No Toxins – Paraben-free, alcohol-free, and preservative-free
- Deep Moisturization – Penetrates and heals the skin barrier
- Eco-Friendly – Less waste, reusable jars, and no plastic pumps
- Tailored for Your Skin – Adjust oils based on your skin’s needs
- Budget-Friendly – One batch lasts for months and saves you money
Also Read: Hydrating Face Gel with Aloe & Cucumber – Homemade Hydrating Face Mask
Key Ingredients That Make This Homemade Body Butter a Winter Skin Saviour
What makes this homemade body butter truly magical is the blend of powerful, plant-based ingredients that work harmoniously to heal, protect, and deeply moisturize your skin. Each component brings its own set of nourishing properties to the mix—no fillers, no fluff, just pure goodness.
Let’s explore what goes into this dreamy, whipped treat for your skin:
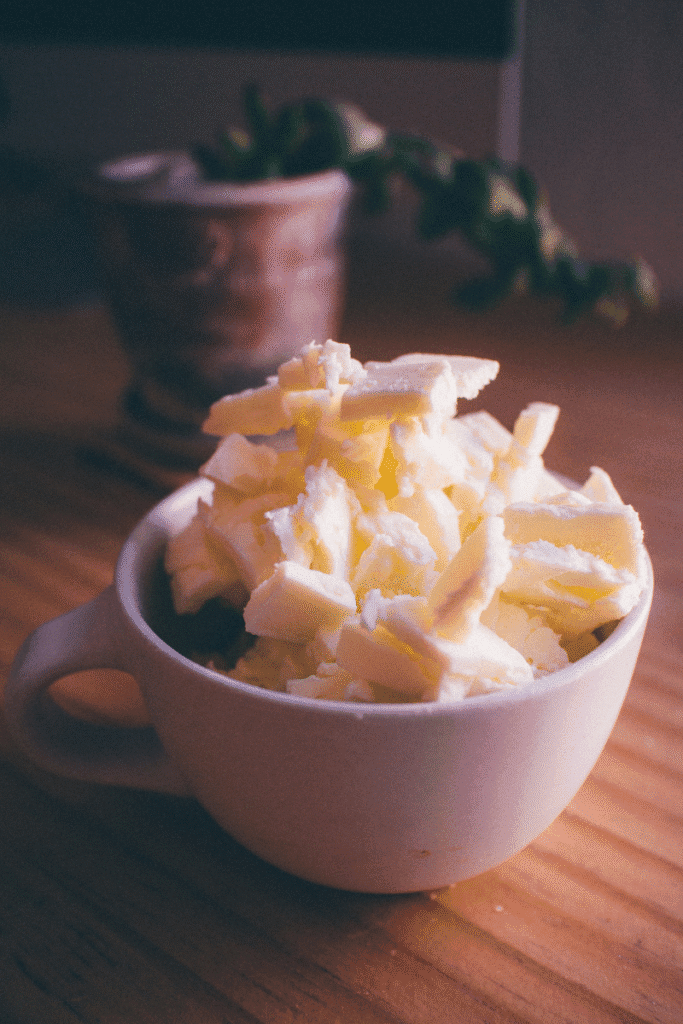
Unrefined Shea Butter – The Deep Healer
Shea butter is the heart of most body butters, and for good reason. Unrefined and raw shea butter is packed with essential fatty acids and skin-replenishing vitamins A, E, and F.
- Deeply hydrates and softens rough skin
- Improves skin elasticity and smoothness
- Calms irritation, redness, and flakiness
- Supports skin barrier repair during harsh winter months
Cocoa Butter or Mango Butter – The Moisture Sealers
These rich, velvety butters give your body butter its luxurious texture and help seal in moisture.
Cocoa Butter:
- Rich in fatty acids for intense hydration
- Leaves a mild chocolate-like aroma
- Thicker and heavier—ideal for very dry skin
- Boosts skin firmness and elasticity
Mango Butter:
- Lightweight and non-comedogenic
- Ideal for oily, acne-prone, or sensitive skin
- Rich in vitamins A and C
- Helps soothe inflammation and smooth skin texture
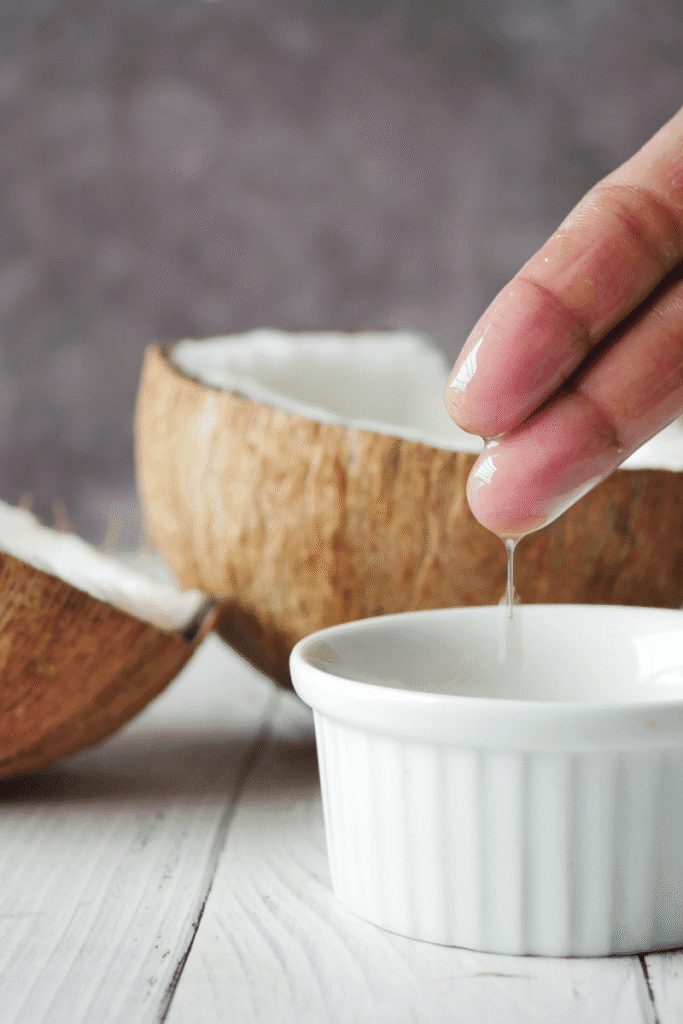
Coconut Oil or Sweet Almond Oil – The Nourishing Carriers
These oils form the base that helps deliver nutrients deep into your skin and add softness to the whipped blend.
Coconut Oil:
- Naturally antibacterial and antifungal
- Excellent for restoring dry, cracked skin
- Leaves a slightly glossy finish
- Best for dry or normal skin
Sweet Almond Oil:
- Lightweight and gentle on sensitive skin
- Rich in vitamin E and antioxidants
- Helps relieve itchiness and soothe irritation
- Non-comedogenic and suitable for acne-prone skin
Jojoba Oil or Olive Oil – The Skin Balancers
These liquid oils mimic your skin’s natural sebum and help balance moisture levels, without clogging pores.
Jojoba Oil:
- Closely resembles human sebum
- Easily absorbed and non-greasy
- Great for combination or oily skin
- Helps soothe inflammation and repair skin barrier
Olive Oil:
- Packed with polyphenols and vitamin E
- Rich and nourishing for severely dry or mature skin
- Helps combat oxidative stress and signs of aging
- Acts as a protective shield in cold climates
Essential Oils (Optional) – The Aromatic Enhancers
While not necessary, adding a few drops of essential oil can elevate your homemade body butter into a sensory spa-like experience—with bonus skin benefits.
- Lavender – Calms irritation, promotes relaxation
- Chamomile – Soothes sensitive skin, reduces redness
- Frankincense – Boosts cell regeneration, firms and tones skin
- Sandalwood – Deeply hydrating and grounding in scent
How to Make Whipped Homemade Body Butter: Step-by-Step DIY Recipe
Yield: Makes about 200g – fills one 200ml jar or two 100ml tins.
Ingredients:
- ½ cup unrefined shea butter
- ¼ cup cocoa or mango butter
- ¼ cup coconut oil or sweet almond oil
- 2 tbsp jojoba or olive oil
- 10–15 drops essential oil (optional)
- 1 tsp arrowroot powder (optional – for a matte finish)
- Clean jar or tin for storing
Instructions:
- Melt the base:
In a double boiler (or bowl over simmering water), melt shea butter, cocoa/mango butter, and coconut/almond oil. Stir gently until fully liquefied. - Cool the mixture:
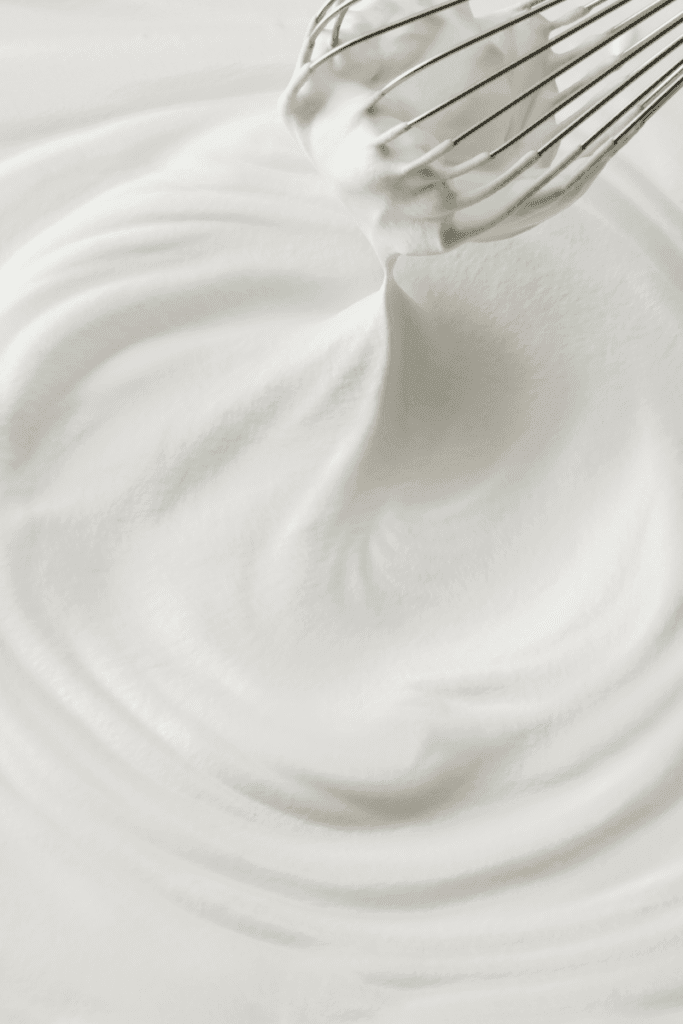
Remove from heat. Stir in jojoba/olive oil and arrowroot powder. Place in the fridge for 1 hour until edges solidify. - Whip it up:
Use a hand mixer or stand mixer to whip for 5–8 minutes until fluffy. - Add scent (optional):
Fold in essential oils and whip briefly again. - Store safely:
Scoop into clean jars or tins. Store in a cool, dry spot.
How to Use Homemade Body Butter for Maximum Results
Making your own homemade body butter is just the beginning—the secret to glowing, deeply nourished skin lies in how you apply it. Body butter is richer and thicker than your average lotion, so using it correctly helps your skin absorb all the goodness without feeling greasy or heavy.
Here’s how to get the most from every dreamy scoop:
When to Apply
Always apply your body butter immediately after a warm shower or bath, when your skin is still slightly damp—not dripping, but not completely dry either. This is when your pores are open, and the skin is most receptive to moisture. The residual water on your skin helps the butter melt in effortlessly and lock in hydration.
Think of it as sealing in the water like a top coat for your skin.
Where to Apply: Dry Zones That Need Extra Love
While you can absolutely use homemade body butter all over your body, some areas tend to get extra dry, especially in colder months. Be sure to spend a little more time on these zones:
- Elbows – Often forgotten but frequently dry and rough
- Knees – Can appear dull and patchy without regular hydration
- Feet & Heels – Prone to cracks and calluses; butter helps soften tough skin
- Cuticles & Hands – Constantly exposed and washed, they need daily care
- Shins & Lower Legs – Often flaky, especially after shaving or in winter
💡 Pro Tip: Overnight Deep Repair
For areas that are especially dry or cracked (like heels, hands, or cuticles), turn your body butter into an overnight treatment:
- Apply a generous layer of body butter before bed
- Slip on a pair of cotton socks or gloves
- Wake up to silky-smooth, repaired skin by morning
It’s like a nourishing sleep mask for your body!
Shea butter, a popular ingredient in homemade body butter, is cherished for being deeply moisturizing and skin-soothing, while maintaining a lightweight texture—making it suitable for most skin types.
Application Tips for Best Absorption
If layering with other skincare (like oils or toners), use butter last to seal everything in thick layers on hands and feet before bed, then wear cotton gloves or socks overnight.
Use clean, dry hands or a wooden spatula to scoop the butter from the jar (this keeps it bacteria-free)
Warm it between your palms before applying—it melts with body heat and spreads more easily
Massage it in using circular motions, especially on legs and arms, to boost circulation and absorption
Customize Your Homemade Body Butter Based on Skin Type
One of the biggest advantages of making your own homemade body butter is the ability to tailor every ingredient to suit your unique skin. No one-size-fits-all formulas here—just thoughtful blends that respond to what your skin truly needs.
Here’s how you can tweak the base recipe for different skin concerns:
For Very Dry or Flaky Skin
If your skin feels tight, cracked, or rough—especially during winter—opt for rich, heavier ingredients that offer deep nourishment and barrier repair.
What to Add:
- Cocoa Butter – Denser than mango butter, it forms a protective layer that seals in moisture and prevents trans-epidermal water loss
- 1 tsp Vitamin E Oil – A powerful antioxidant that promotes healing and adds extra moisture retention
- Avocado Oil (a few drops) – Rich in oleic acid and essential fatty acids, perfect for softening severely dry skin
For Sensitive or Reactive Skin
Easily irritated or inflamed skin needs a gentler formula—one that soothes without triggering flare-ups. Focus on calming, non-fragrant oils and lightweight butters.
What to Include:
- Skip Essential Oils – Even natural fragrances can be irritating to sensitive skin
- Sweet Almond Oil or Calendula Oil – Both are hypoallergenic and help calm inflammation or redness
- Mango Butter – Lighter than cocoa butter and absorbs quickly without clogging pores or leaving a greasy layer
💡 Patch test always recommended when trying new ingredients
For Acne-Prone or Oily Skin
Breakout-prone skin still needs moisture—but it needs the right kind. Using non-comedogenic oils and a non-greasy texture can help maintain balance without clogging pores.
Smart Substitutions:
- Avoid Coconut Oil – While nourishing, it can clog pores on acne-prone skin
- Use Grapeseed Oil or Hemp Seed Oil – Lightweight, anti-inflammatory, and rich in linoleic acid (great for oily/acneic skin types)
- Add 1–2 drops Tea Tree or Lavender Oil – Naturally antibacterial and calming for inflamed breakouts
- Arrowroot Powder (1 tsp) – Reduces greasiness and gives a smoother, matte finish
📌 Also Read: Sensitive Skin? Here’s a Calming DIY Routine That Works
Storage Tips & Shelf Life
- Store in a cool, dry spot away from sunlight
- During summer, refrigerate to maintain the whipped texture
- If it melts, chill again and re-whip
- Shelf life: Up to 6 months when kept clean and sealed
Common Issues + Fixes
| Problem | Solution |
|---|---|
| Too oily? | Add more shea butter or 1 tsp arrowroot powder |
| Too hard? | Add more jojoba or almond oil |
| Melted? | Chill in fridge and re-whip until fluffy |
| Greasy feel? | Use less or apply only on damp skin |
Optional Add-Ons to Make It Extra Special
- Rosehip oil – Helps with scars and pigmentation
- Arrowroot powder – Smooth, powdery finish
- Beetroot powder – Natural blush tint
- Vanilla extract – Sweet, cozy scent
Why Making Your Own Body Butter Is a Beautiful Ritual
Creating your own homemade body butter is more than skincare—it’s self-care. You’re avoiding chemicals, reducing waste, and treating your skin with love and attention. Plus, the scent, texture, and richness are completely in your control.
This isn’t just a moisturizer—it’s your skin’s winter blanket. Soft, nourishing, healing.
When comparing plant-based butters, understanding the unique properties can be helpful. For example, cocoa butter offers richer barrier protection, while shea butter brings anti-inflammatory and antioxidant benefits—both complement each other in body butter blends
Your Winter Skincare Essential You’ll Keep Coming Back To
Winter may be beautiful, but for your skin—it’s a battle. Between freezing winds, dry indoor heat, and moisture-stripping fabrics, your skin needs more than just a basic lotion. It needs comfort. It needs healing. It needs deep, genuine nourishment—and that’s exactly what this homemade body butter delivers.
Unlike commercial creams that often sit on the surface (or worse, dry your skin out with hidden alcohols and preservatives), this whipped butter sinks in, softens, and stays, leaving your skin feeling silky—not sticky.
And the best part? You made it.
From hand-selecting every ingredient to whipping it to perfection, you’ve created something that’s more than a skincare product—it’s a self-care ritual in a jar.
Once you experience how your skin feels after a few days—calm, hydrated, and glowing—you won’t look back. This body butter won’t just be a winter fix; it’ll become a year-round staple you’ll proudly refill.
💛 So, skip the shelves.
Whip up your own.
And let your skin thank you—naturally.
Free Printable Label Idea:
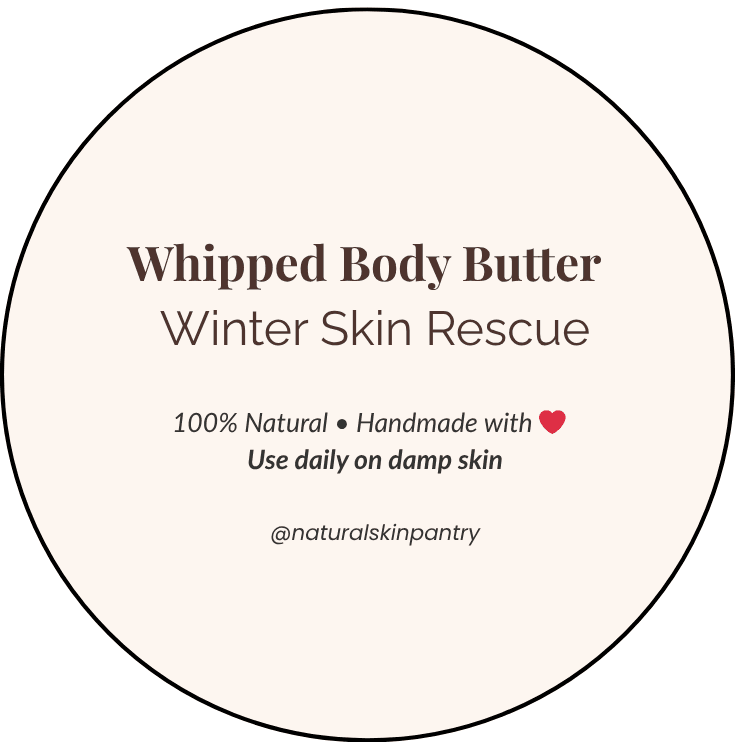
🖨️ Want to print this label?
Click here to download the PDF version
Whipped Body Butter – Winter Skin Rescue
100% Natural | Handmade with ❤️ | Use daily on damp skin
You May Also Like:
- Hydrating Face Gel with Aloe & Cucumber – Homemade Hydrating Face Mask
- Control Oily Skin Naturally with Multani Mitti & Neem
- How to Reduce Open Pores with Rice & Aloe DIY
Loved this routine? We share more like it on Pinterest!
Follow us on @NaturalSkinPantry for DIYs, seasonal skincare, and natural glow-ups
Tried this DIY? Let your skin (and feed) shine!
Tag @naturalskinpantry — we’d love to feature your gorgeous jars and radiant glow!
Disclaimer:
The information provided on skincaresolutions.in is for informational purposes only and reflects personal/home remedies that are commonly used in skincare. It should not replace professional advice. Please do a patch test before trying any new ingredient. If you have sensitive skin, allergies, or medical conditions, consult a dermatologist before use.